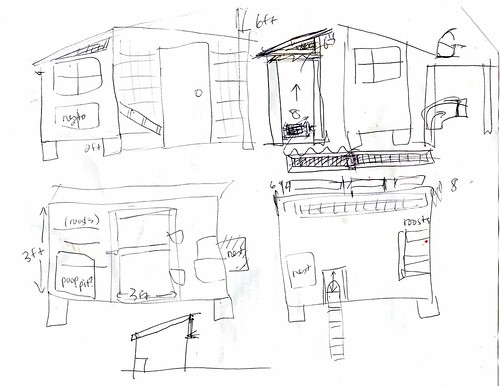
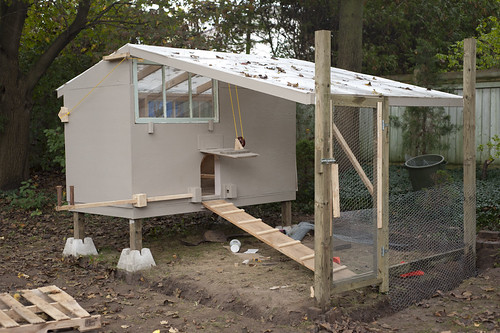
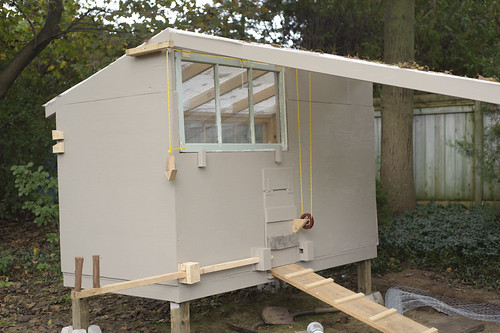
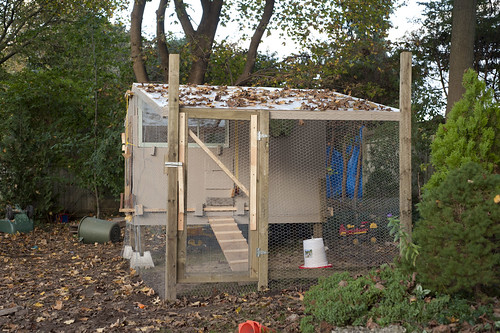
So this is where we started. We chose the dimensions for simplicity, based on plywood sheets of 4 feet by 8 feet. We adjusted the design a bit. The low wall is four feet and the higher wall of the coop is 5 feet tall.
And here it is the day after Halloween. (How happy are we to have our jack o'lantern get eaten? SO happy!)
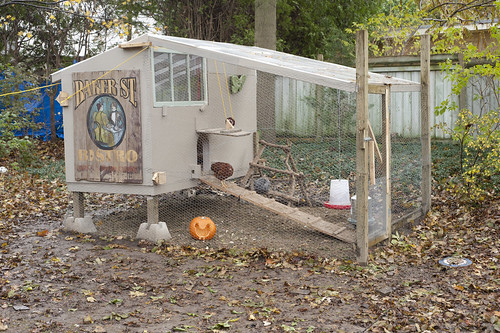
We would have liked to build nest boxes out from the main part of the building, but my dad was only here for two days, so it just seemed more complicated than it was worth. Plus we could always upgrade in the future. For now, the nest boxes are in the main part, just behind the bottom of the Baker St. sign, and we access them through the human door on the east wall.
This picture shows you our roost ladder. Mostly the ladies all crowd onto the top bar, but I think they still have a fair amount of growing to do, so eventually I imagine they won't be able to fit. I read that the roosts should allow 12 inches for each bird's width and we spaced the boards about 14 inches apart from each other I think, to prevent higher birds from pooping on lower birds.
We changed the placement of the windows. Originally I was planning for just one, but we decided to do the two we had in the shed, with one of the east side for morning light, and one that opens on the west side for summer breezes. (The prevailing winds come from the northwest. I was hoping the house would shelter the coop heavy winds, but it does not.)
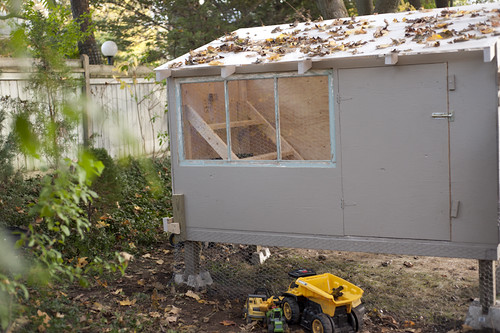
We were very concerned about ventilation, as we read somewhere that you need one square foot of ventilation per hen, even in winter. We ended up not putting in a vent on the north side like in the drawing because we figured it would be too windy. So we left the spaces between the rafters open, and created a vent on the south wall. Since then we have filled the rafter spaces with styrofoam sheets of insulation, which we'll take out in the summer. We've also covered the vent, which is right over their roosts.
You can see the big vent here:
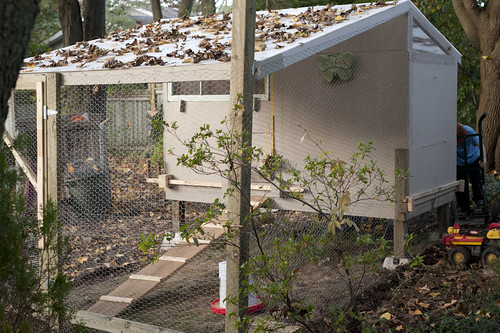
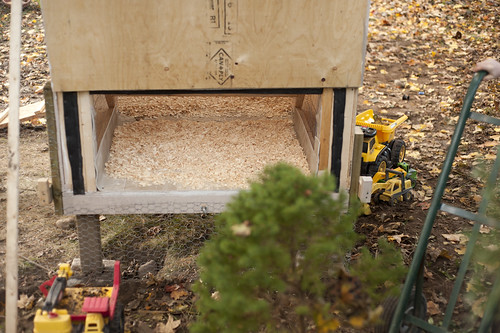
You can also see the other thing on the right-hand wall that I'm very proud of: the poop pit door. It wasn't my idea, but all the best artists are the best thieves. Apparently chickens poop most of their poop at night, when they're roosting. We chicken wired under the roost ladder so the birds can't walk around in their poop, and we made a sort of trap door, so we can just open the door and scrape out the poop. We can do it daily if we want. And the rest of the coop stays pretty clean, since they're mostly outside or sleeping.
Here it is open, with some shavings spread to absorb some of the moisture and odour:
And here are the nest boxes with the first curtains I've ever 'made':
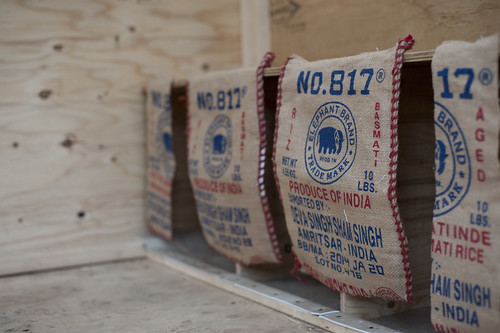
We read somewhere that hens like their nest boxes dark and private, so I thought the curtains would help. I've been holding onto our old rice bags for ages, because they're so beautiful, but I haven't known what to do with them. This seemed a perfect use. We nailed a small board along the floor so that the eggs won't roll out.
The downside of the poop pit is that it significantly reduces the square footage available for the hens to hang out in during the day if they want. I had read to give hens 4 square feet of floor space each, and at 4 feet by 8 feet, ours was big enough for 8 hens. And I pretty much cut that in half with the poop pit. Given that our run is roofed, I'm not too worried as they really don't spend a lot of time in the coop (so far, anyways), but I'm very aware that we're really at max. capacity with our 9 hens. So we will be making some hard decisions for at least some of them when they stop laying eggs.
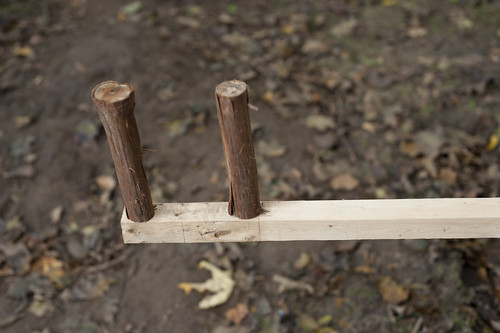
The last thing to show you is my husband's ingenious mechanism for opening and closing and locking the chicken's pop door. I will confess that at the time I thought he was overcomplicating things, but I let him go ahead because he was so clearly enjoying it. But I have to say, now, I'm pretty impressed.
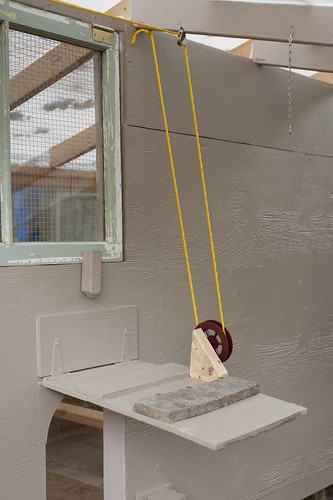
We can open and close it without going into the run, which is nice because we usually do it in semi-darkness at either end of the day. Our run is predator-proof enough that we could just leave it open but I figure when it's cold it's nice to shut them cosy and even safer. Plus we have recently seen raccoon footprints around a few spots where they've tried digging under the fence. (Thank goodness my husband didn't listen to me when I suggested we take the 'easy' way out and just fence down to the ground to avoid all the digging required to bury the fence!)
Back to the door. So my husband rigged up a pulley system that takes the cord up to the roof and outside the run.
He rigged up a neat little thingie to hold the door open.
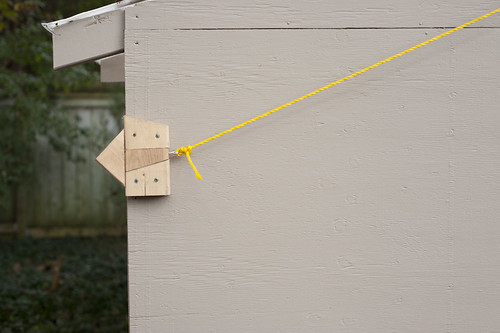
Here the little arrow/handle hanging when the door is closed.
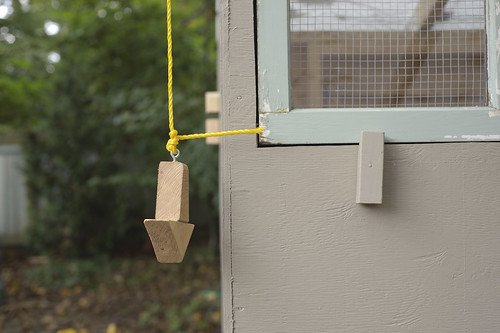
He had to add a weight to the door so it would close most of the way on its own.
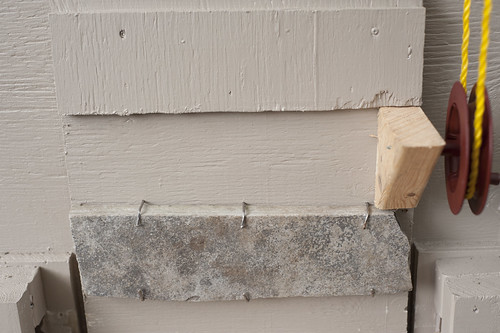
He also built the bits to hold the rod in place, and he made the end of the rod angled on one side so it would go over the door while closing it the rest of the way tight.
He even made his own handles for the rod from some pruned branches.
So I think that's just about it. We've also done tons of research and a few amendments for helping the hens manage the cold, but I'll save that for another post.
That's a good looking coop! I think the pulley door is my favourite part.
ReplyDelete